HR team
Administrators
Personas
The HR manager persona
The HR advisor persona
The manager persona
The administrator persona
The employee persona
Uploading files and photos
Files uploaded via workflow
Files uploaded via mail merge
Files uploaded via cloud folders
Files uploaded via an import
Uploading a photo as part of a record
Files uploaded via a batch job
Uploading a file as part of a record
APIs
Knowledge base
Advanced HR Home page
Home navigation
Records navigation
Employee details pages
Actions navigation
Reports navigation
Tools navigation
Files navigation
Admin navigation
New Error/Info pages
Holiday Year End
Support is Evolving
Configuring HR
Policies
Fixed layout
Why are my guidance labels missing?
How to convert a fixed label to a calculated label
How to amend the positioning of a label in an action
Page designer
Processes
Process listing
Process overview: New starter
Process overview: Annual leave cancellation
Process overview: Update my diversity details
Process overview: Subject access request
Process overview: Absence cancellation
Process overview: Shared parental leave request
Process overview: Flexible working request
Process overview: Transfer Adoption to Absence
Process overview: Change of address
Process overview: Transfer Paternity (Birth) to Absence
Process overview: Shared parental leave notification
Process overview: Change of contact details
Process overview: Transfer Paternity (Adoption) to Absence
Process overview: Record leaver
Process overview: Statutory parental bereavement leave notification
Process overview: KIT days request
Process overview: Manage course delegates
Process overview: Annual leave request
Process overview: Absence request
Process overview: Transfer Maternity to Absence
Process overview: Leave authorisation
Process overview: End of year rollover
Process overview: Leaver
Process overview: Sickness continuation
Process overview: Record new starter
Process overview: Record sickness
Process overview: 360 Appraisal feedback
Process overview: Cancel a course
Process overview: Change of bank details
Process overview: Appraisal
Process overview: Training need request
Process overview: SPLIT days request
Process overview: Statutory parental bereavement leave
Access to System and Security Manager
Employees
Release notes
HR 25.1 - 23rd May 2024
Advanced HR 24.10 - 29th February 2024
Advanced HR 24.9 - 18th January 2024
Advanced HR 24.8 - 2nd November 2023
Advanced HR 24.7 - 28th September 2023
Advanced HR 24.6 - 29th August 2023
Advanced HR 24.5 - Thursday 27th July
Advanced HR 24.4 - 22nd June 2023
Advanced HR 24.3 - 18th May 2023
Advanced HR 24.2 - 13th April 2023
Advanced HR 24.1.1 - 23rd March 2023
Advanced HR 24.1 - 9th March 2023
Advanced HR 23.5 - 9th February 2023
Advanced HR 23.4 - 17th January 2023
Advanced HR 23.3 - 15th December 2022
Advanced HR 23.2 - 27th October 2022
Retiring AVA
Advanced HR 24.1 Hotfix - 11th October 2024
- All categories
- Administrators
- Configuring HR
- Policies
- Leave Policies
Leave Policies

This article is for the standard version of Advanced HR
If you are unsure whether something in this documentation applies to your version of the system, please contact your system administrator for assistance.
Leave Policies
Welcome to the help page for setting up leave policies in Advanced HR! In this help document, you will find step-by-step instructions for creating leave policies. If you require one or more leave policies, Advanced HR makes it easy for you to set up and assign to employees. Follow the instructions below to get started.
Setting Up a New Leave Policy
All businesses have one or more leave policies, these can be different for different types of employees. Here's how this can be done.
1) Find the Leave Policies Table
2) Create a new Leave Policy and fill in the description
◼ Enter a name for your leave policy.
◼ Enter a description to help easily identify the policy details.
◼ Set the Entitlement in value to either Hours or Days
3) Then specify the leave entitlement options
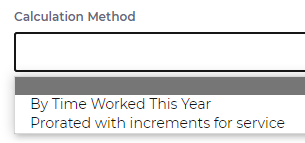
◼ Select the calculation method.
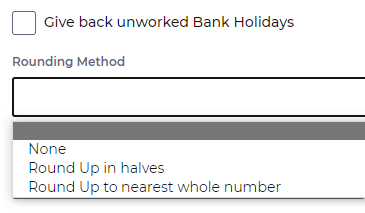
◼ Tick if you wish to give back unworked Bank Holidays.
◼ Select the rounding method.
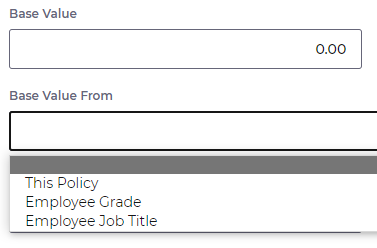
◼ Enter a Base Value and/or select where the base value will come from.
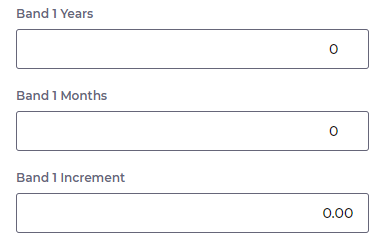
◼ If your policy includes increments for service, enter the years and/or months with the value.
There are 5 options available for incremental service.
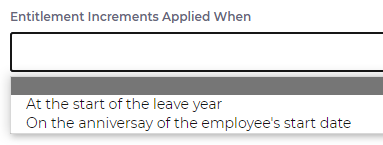
◼ If your policy includes increments for service, enter when you would like this to be applied.
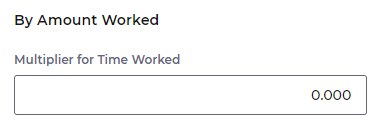
◼ If you have selected calculation methods By Time Worked This Year enter the multiplier for time worked value.
4) Then set up your leave brought forward, purchased and sold options
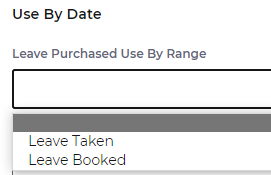
◼ If you allow leave to be brought forward and/or purchased, choose how you wish to define the value that is calculated for the total 'used' leave.
Leave taken totals up any leave durations between the start of the leave year and the current date.
Leave booked totals up all leave durations for this current leave year, this value includes future leave bookings that have not yet been taken.
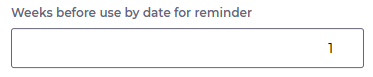
◼ Select how many weeks the brought forward and/or purchased leave use by reminder will be sent.
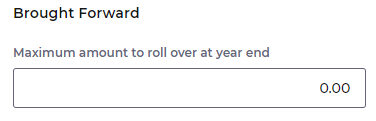
◼ If you allow leave to be brought forward, select the maximum allowed roll over value.
◼ Select when the brought forward and/or purchased is to be used by.
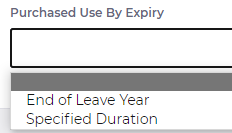
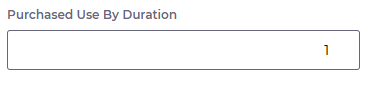
◼ If Specified Duration is selected, choose the number of months for this duration.
Assigning Leave Policies to Employees
Now the leave policies have been created, they need to be assigned to employees. Here's how this can be done
1) Assigning a leave policy to an individual employee record
◼ Select the latest current Employment History record, click on the Edit button and enter an End Date, click on the Save button.
◼ Return to the Employment History list and copy this record.
◼ Update the Start date and End date.
◼ Go to the Leave Entitlements tab.
◼ Locate the Leave Entitlement Policy column and click to reveal the policies available.
◼ Click the link for the policy required.
◼ Click on the Save button